Trends may come and go, but you can still be “trendy” while also staying timeless and classic. This year, a lot of the great trends we’re seeing around the country are just that—timeless. Some trends are better left undone, and the “go big or go home” mentality is not always the best when it comes to such an expensive and large item as a home. You can still pack a beautiful and current punch with an exterior remodel while also feeling secure that you won’t want to redo everything in just a few years.
Let’s talk colors. The color of your home is a huge deal, whether it’s brick, stucco, siding, or a combination of materials. White has been huge for a while; you’ve seen it everywhere – maybe you even live in it! White is going stay, but this year it’s going a bit softer. Think warmer whites and light creams (not beige or tan though) this year instead of the stark whitest of whites. The contrast with a dark or even black is also looking like it’ll stay. It’s a classic look that is pretty on basically every style from farmhouse to contemporary and French country to colonial designs. If you love the contrast but are worried to get in too deep, go for a color blocking method, which allows you to experiment with your contrasting desires without going too much. Other color options that will likely remain popular include neutrals that are soft and blend into nature, such as subtle greens and blues. If you’re in an older home, simply painting the brick, siding, or stucco will completely transform your home. Bring your ideas to us—we have lots of experience and can provide great advice.
How about textures? Adding some texture to your exterior is a great way to bring a classy and expensive look to your home. Wood trims, stone sections, or brick accents are great options. This year we’re seeing a love for copper which is beautiful on the eyes but not so much on the pocketbook. There are many options even if you’re on a tight budget. Faux accents are readily available and when applied correctly, they can look just a gorgeous as the real thing. If you want to mix textures, this is a great year to do it. You’ll want a builder you can bounce ideas off of to make sure you don’t get too much going and to help you find materials that go well together. Adding cosmetic textures is a relatively inexpensive way to update your home.
The modern minimalist. Minimalist design has been a popular interior design trend for a while. We’re seeing a desire for a similar look on homes’ exteriors. We know this design can get very bold very quick, but don’t be afraid to add in elements somewhere on your home’s exterior. Think monochrome lighting, more windows, simple and clear geometric lines, and simple yet elegant features.
Redesigning or remodeling the exterior of your home is a big project that can change the whole look of your home. Our professionals can deliver whatever new look you want for 2022.
Stucco is a common exterior finishing in Utah due to its ability to withstand the high heat in the summer and the extreme cold in the winter and with its high resistance to water damage. Stucco is also very affordable and looks amazing for years when installed by a professional. There are numerous color options for stucco exteriors, and because it’s so affordable, it’s easy to update later on if you want to try a new look as trends come and go.
Real estate in Utah is booming with new homes being built all over the state. If you’re building a home or renovating, you can’t go wrong with a beautiful stucco exterior. There are several finishing options to choose from such as worm finishes with tiny indents and grooves, smooth finishes that have a clean European look, sand finishes that are simple and familiar, or lace finishing, which is the most common style you’ve most likely seen before, and even more.
Warm wood tones, creamy whites, dark grays, and bronzes are predicted to be hot choices for home exteriors throughout 2021 and 2022. Whether you have the gorgeous Wasatch Mountains as your backdrop or the stunning red rocks around central and southern Utah, a classic black or dark gray trim with white stucco is one very popular option right now, yet also timeless. The high contrast in this finishing is eye-catching and can be especially appealing on a new home. On the contrary, a white on white can be just as stunning. There are a million shades of white that can be beautiful when paired together appropriately. Combining two different shades of white with your stucco and trim creates a soothing look for your exterior style.
With stucco, you can easily showcase your bold and artistic flare with numerous color choices. Navy with a bright white trim can be truly elegant. By pairing a dark color such as navy or green with a thin neutral white trim will keep the attention where you want it while also creating clean lines and finishes. Red shades pair very well with wood elements and darker trims, creating a welcoming, warm exterior that is also eye-catching. In Utah, a rich red stucco looks especially amazing against the greenery in the spring and summer as well as the white snow in the winter. Our team of experts can help you decide on what color combinations speak to you while also informing you of what’s trending.
RAM Builders has your back when it comes to your home’s stucco exterior anywhere in Utah. We keep up on current trends and understand the importance of a timeless look, which allows us to proficiently assist you from the initial color and finishing style selection process to the final application. Our crew consists of employees rather than mostly subcontractors, so you can trust that we are highly trained and committed to our projects. Our employees are clean, efficient, and knowledgeable about everything stucco (and more!).
Dry rot is like mushrooms. It’s a fungus that can get established in wet wood. Dry rot doesn’t happen in dry wood, the wood has to be moist. Normally dry rot occurs where there is a water leak entering the home. As the fungus matures, it shrinks and cracks the lumber.
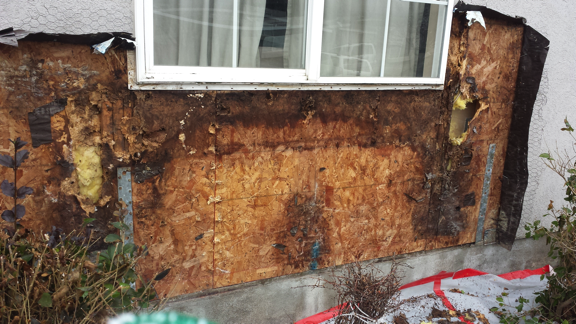
Even after the water source (the leak) has been repaired, the fungus that causes the dry rot will remain. This fungus can survive a wide range of conditions by staying dormant when its too wet or dry. Once the dampness of the wood returns to the ideal range, the dry rot starts to grow again.
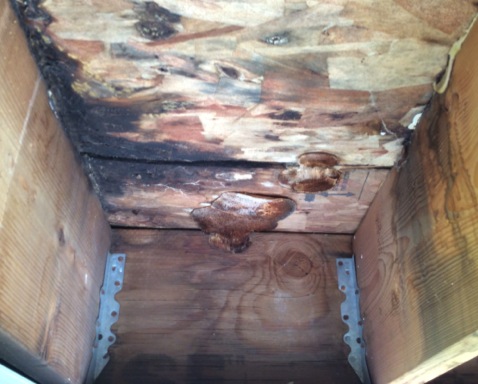
The most important advice for any homeowner with a wet wall problem is before beginning any construction repairs to the dry rot area, be sure that you find the location of the water source/leak and make the proper repairs to eliminate any future problems. The following are some common problems to look out for.
This type of rot shows up at the lower corners of the windows and spreads out from there. In extreme cases, the entire wall area under the window can be rotten. To solve this problem, the window will need to be removed. At times the said window may need to be replaced due to it being compromised/damaged or a window pan may need to be installed. The window will then be re-installed and correctly flashed.
Improperly constructed connections are a common problem. Keep an eye out for trouble in these locations:
- Eave to wall connection
- Roof to wall connection
- Eave to roof connection
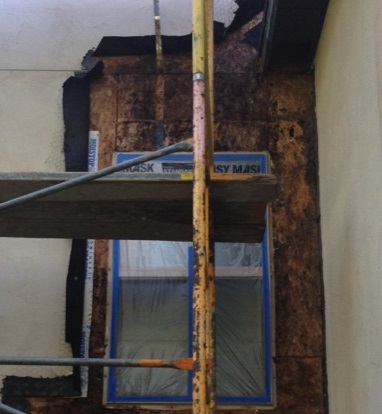
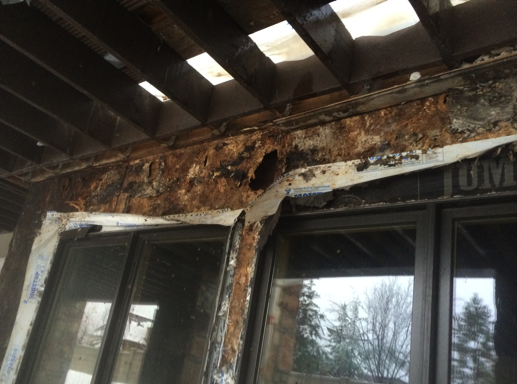
New construction is exciting. Whether you’re starting from scratch or remodeling an existing building, you expect you’ll end up with something better than what you started with.
But unfortunately, that’s not always the case.
New, inexperienced, lazy or poorly managed construction companies can make mistakes, turning your exciting project into a nightmare. When it’s your home they’re working on, the decision lies with you on how to deal with the aftermath. But when you live in a community with a homeowners association, it’s the HOA that makes the decisions, not you.
And far too often, they make the decision to file a lawsuit. If the outcome of a lawsuit was that the wronged parties received restitution, I would be all for it. But I’ve seen these lawsuits dozens of times, and I can assure you, rarely do I see a happy ending.
When an HOA files a lawsuit against a construction company for a construction defect, the result is not a pile of cash delivered to the next board meeting on the calendar. These lawsuits can drag on for years. And they’re expensive.
Many area Utah law firms will take an HOA’s case on a contingency basis, which means the HOA doesn’t pay its lawyer until the construction company pays them. Good deal, right? No expenses for the HOA until it gets what it rightfully deserves.
Not exactly.
Legal fees aren’t the HOA’s only cost. They also have to pay for expert opinions, destructive testing, emergency repairs and engineers as the lawsuit progresses — not after it collects. This can get costly, leaving the HOA in danger of becoming insolvent.
I worked with an HOA in Lehi, Utah, that had to wait 14 years to collect the money they won. Once the law firm took their contingency fee, the HOA didn’t have enough left to pay for the repairs the buildings needed. So the HOA prevailed, but they still lost.
Further, the aforementioned lawsuit severely inconvenienced homeowners who couldn’t sell their home for the 14 years it was going on. Selling a home that’s tied up in a lawsuit can be nearly impossible.
During the time litigation is pending, property value is diminished. Even if the owner could find a buyer and was willing to take less for their home, banks often won’t lend money on houses with construction defects.
The homeowner could rent out their unit, but then they would have no equity to apply toward their new home. With dues rising to pay for the lawsuit, it could be hard for them to cover the mortgage and the related expenses on what they collect in rent.
In fact, it can be difficult to pay these expenses even if they don’t want to move, as soaring HOA fees can strain a budget until it breaks.
Instead of filing a lawsuit against the construction company, HOAs would be better off repairing the defects on their own.
I know; it sounds unfair. The construction company was at fault; they should make it right. But should and will are two different things, and by making the repairs on their own dime, the HOA will usually end up spending less money.
Not only will they save on legal and expert fees and court costs, but they will be able to make the individual decisions about how to proceed during the repair work. A legal agreement or decision will frequently require the work to be entirely redone, when it could easily be repaired for a fraction of the cost.
If your HOA wants to put the time and effort into a lawsuit, there are steps it can take to mitigate unnecessary inconvenience and expense to residents.
Destructive testing is so-called for a reason — parts of a building that work fine are destroyed in the process of seeing whether they or other parts are sufficient or in need of repair. In performing this necessary step in the lawsuit, further damage is done and residents are made to suffer more.
I was recently on-site at a project where openings had been made in the homes’ exteriors as part of destructive testing. While these openings had been patched, not all were patched well, and some leaked. The luckiest residents only had ugly patches on the exterior of their homes; the unlucky ones had leaks to deal with as well.
The shocking part? Residents had been living under these conditions for seven years, as the lawsuit dragged on with no end in sight.
A more sensible solution is to do the repairs at the time of the testing. Expose the issues, document them and fix them. You’ll have an exact cost of repairs versus an estimate, and residents won’t have to live with leaks or ugly patches.
So even if an HOA is convinced that a lawsuit is the way to go, it should, at the very least, repair the damage as part of the process rather than letting it fester for years, unchecked.
RAM Builders has worked on hundreds of home exteriors along the Wasatch Front since 1996. Some cost millions of dollars and others are starter homes. Regardless, no homeowner likes spending money to tear a home apart and put it back the same way it looked when they bought it. But being able to control when and how it is done makes this tough job a little easier.
Cracks happen. You can’t avoid them with stucco, but if you act quickly, you can minimize damage — and the cost of stucco repairs.
Why does stucco crack? If it’s not due to something obvious, like an earthquake or a foul ball, you have to rely on some crack anatomy for your diagnosis.
Know your cracks. Here are four types and what should be done about each, if anything.
1. Hairline Cracks — As you can probably guess, if you’re going to have a crack, this is the best kind to have. Like an ER diagnosis of a painful ankle injury, a hairline crack is not serious. It’s about one-sixteenth of an inch wide and is common in new homes in particular. You’ll see fewer hairline cracks with older homes, built when 2-by-4s were actually two by four, and they were dried in a kiln before being used, so warping and twisting were minimized.
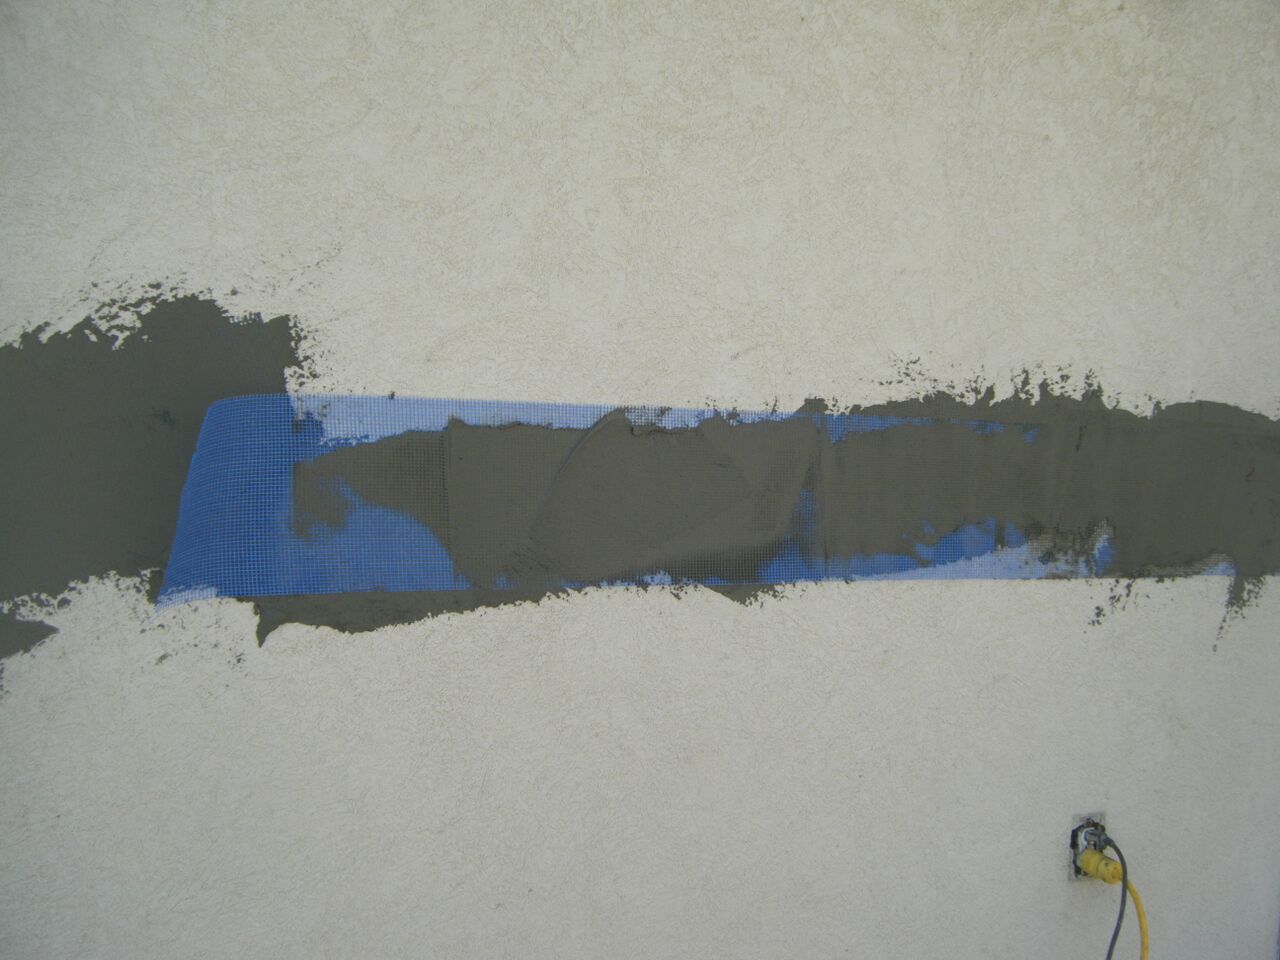
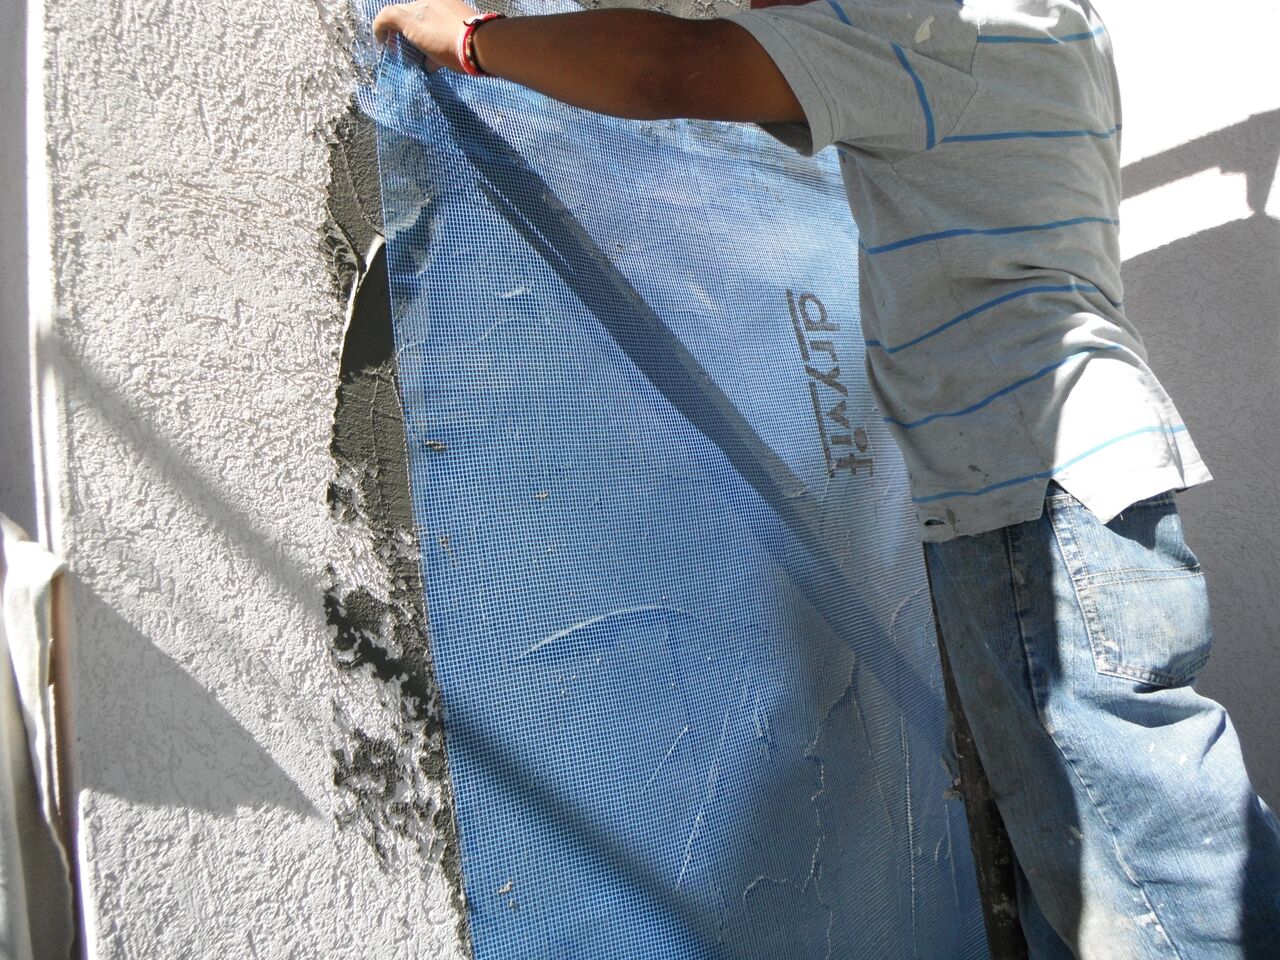
2. Patterned Cracks — If your stucco is cracked in even lines or squares, it’s most likely due to the lath underneath. If it wasn’t nailed down properly or somehow came loose, it can cause the stucco to crack this way. Although the only solution for this is to remove the stucco and reaffix the lath properly, this type of damage is usually found in isolated areas and doesn’t generally affect an entire wall.
3. Spider Cracks — You can likely imagine what these look like. Similar to spider veins and spider plants, spider cracks are long, twisted lines through your stucco finish. You never want to see these. They’re usually an indication that the installation was botched somehow — the stucco was improperly mixed, it was applied in less-than-ideal weather conditions and/or it dried too quickly. Your installer should be held accountable for a problem like this. It may be possible to fill the cracks with caulking and cover the entire surface with an elastomeric coating, but this doesn’t always work. Get an expert opinion, and don’t let your installer put you off or try to get away with a Band-aid fix.
4. Diagonal Cracks — You usually see these emanating from the corners of windows and doors, as with plaster. These types of cracks can signal more of a problem with your structure than your stucco. Diagonal cracking around openings is often related to shift or movement. If you have several of these, or if they are especially wide, you should get an inspection done to certify the integrity of your structure before you embark on any repairs.
If you see any cracks in your stucco, contact the experts here at Ram Builders. We can come out and let you know if your cracks are serious or merely cosmetic, and give you an estimate for repair. You don’t have to live with cracked stucco — call us today and start down the path to a smooth, crack-free exterior.
Repairing stucco might seem easy, but the work has to be done right or it won’t last.Nothing lasts forever, least of all stucco, no matter how skillful the original craftsman was who installed yours in the first place. You will need repairs, the question is when.
If your stucco is compromised, be it from cracks, buckling or other issues, you are going to want to address the problem right away, because the longer you wait, the worse it will get.
When you hire someone to repair your stucco, it should be a company with a history of experience in working specifically with this material. A handyman may be able to mix up some stucco and patch a crack or two, but stucco is not like plaster, and if mistakes are made, they are much more costly with exterior walls than interior ones.
With stucco repair, it’s critical to remove all the loose pieces before applying fresh product, just as you must scrape peeling paint before putting on a new coat. Any stucco that’s not securely adhered to the lath beneath it should be removed, not just crumbling or cracked areas.
The area to be repaired also should be adequately covered with builder’s paper and lath.
Repairs should be done in only optimal weather. Freezing temperatures are the enemy of fresh stucco. The material gains its strength in the hardening process, as the water evaporates from the mixture. If the water quickly freezes, the drying process is disturbed. It’s important that temperatures stay above 40 degrees, even overnight, during the drying time.
Applying stucco in freezing temperatures causes other problems as well, as the cold makes it difficult for the material to remain pliable, and it tends to stick to itself more than the structure. This can result in a dry, crumbling finish.
Excessive heat is almost as bad, robbing the mixture of its moisture too quickly. If repairs must be made in extreme heat, its best to wait for some shade, if possible, or cover the work area in plastic to help retain moisture.
If the weather’s right and the surface is prepared properly, it’s safe to mix and apply the stucco. The mixture has to have just the right proportions, however — it can’t just be eyeballed. If it isn’t mixed right, it may look OK at first, but it will be more vulnerable to cracking sooner.
Ram Builders can diagnose and quickly repair any problems you are having with your stucco exterior so your building is once again properly protected. When you need stucco repaired correctly, rely on us to do the job right.


